Installation
Download installer and tools
OPNsense
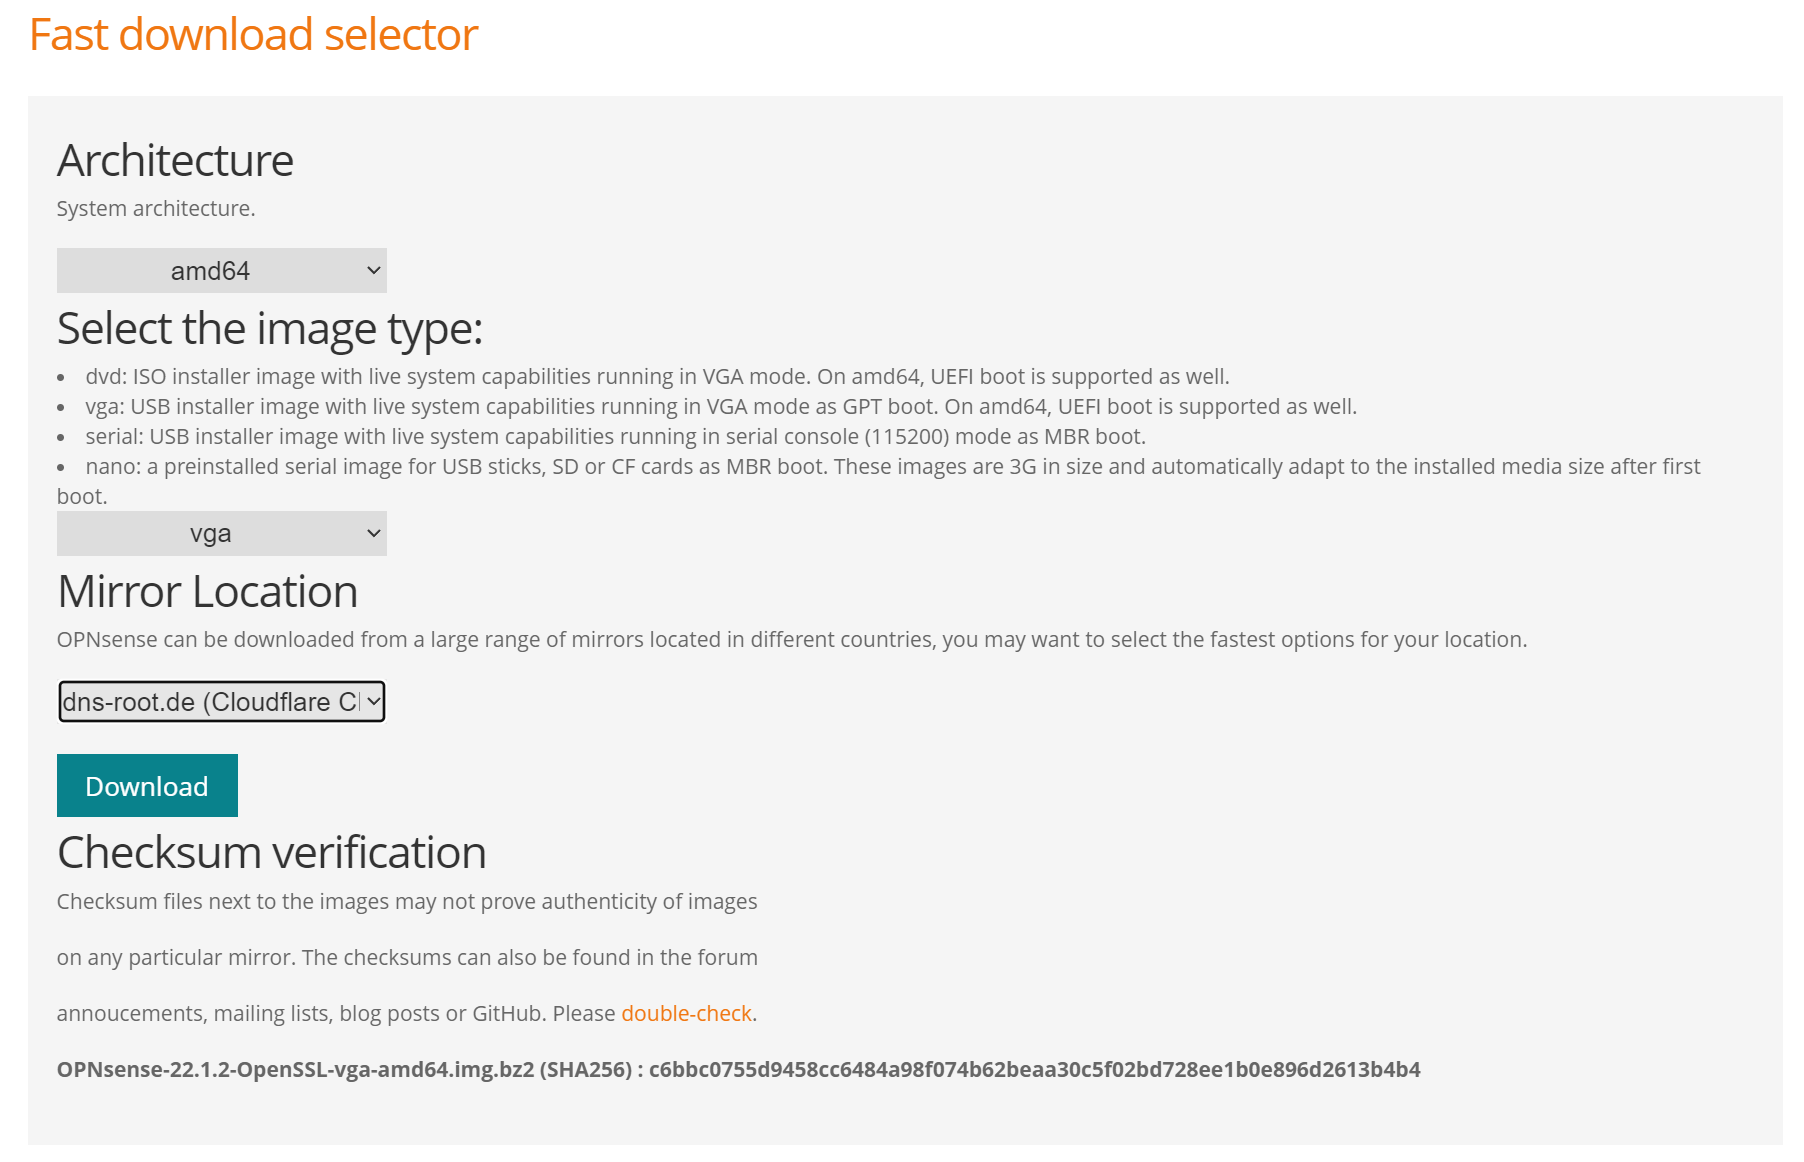
Download the installer from OPNsense official download page
- Select
amd64for system architecture - Select
vgafor bare metal installation orisofor virtualized installation - Select the mirror closest to you
- Click Download
You can skip Rufus and Prepare the installation media (USB)
if you plan to do a virtualized installation
Rufus
Download rufus from their official site Select either the portable version or the installer, both will work.

Prepare the installation media (USB)
This process will DELETE any data in your USB stick.
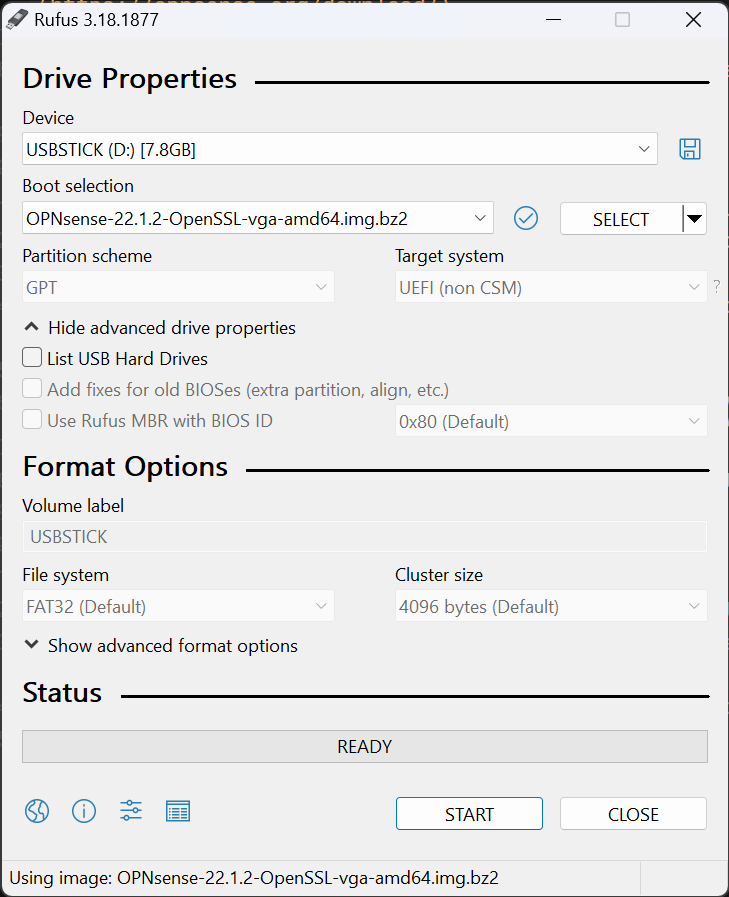
- Run
Rufus - Select your USB Stick on the
Devicedrop down list - On
Boot selectionClick SELECT and select the OPNsense installer we downloaded earlier - Check again that you selected the correct
Deviceon previous step - Click START
- Accept the WARNING saying that will DESTROY your data on this device
Once the process is finished you are ready to install OPNsense to your machine.
Prepare the installation media (Virtualized)
- Mount the ISO file into your VM
- Set it as primary boot device
Installation on bare metal
- Boot your machine from the prepared USB stick.
It will give you some timers to select if you want to manually configure things. Let everything on automatic. Once you reach the login prompt, use the following credentials.
-
Username:
installer -
Password:
opnsense -
Select
Continue with default keymap
-
Select
Install (ZFS)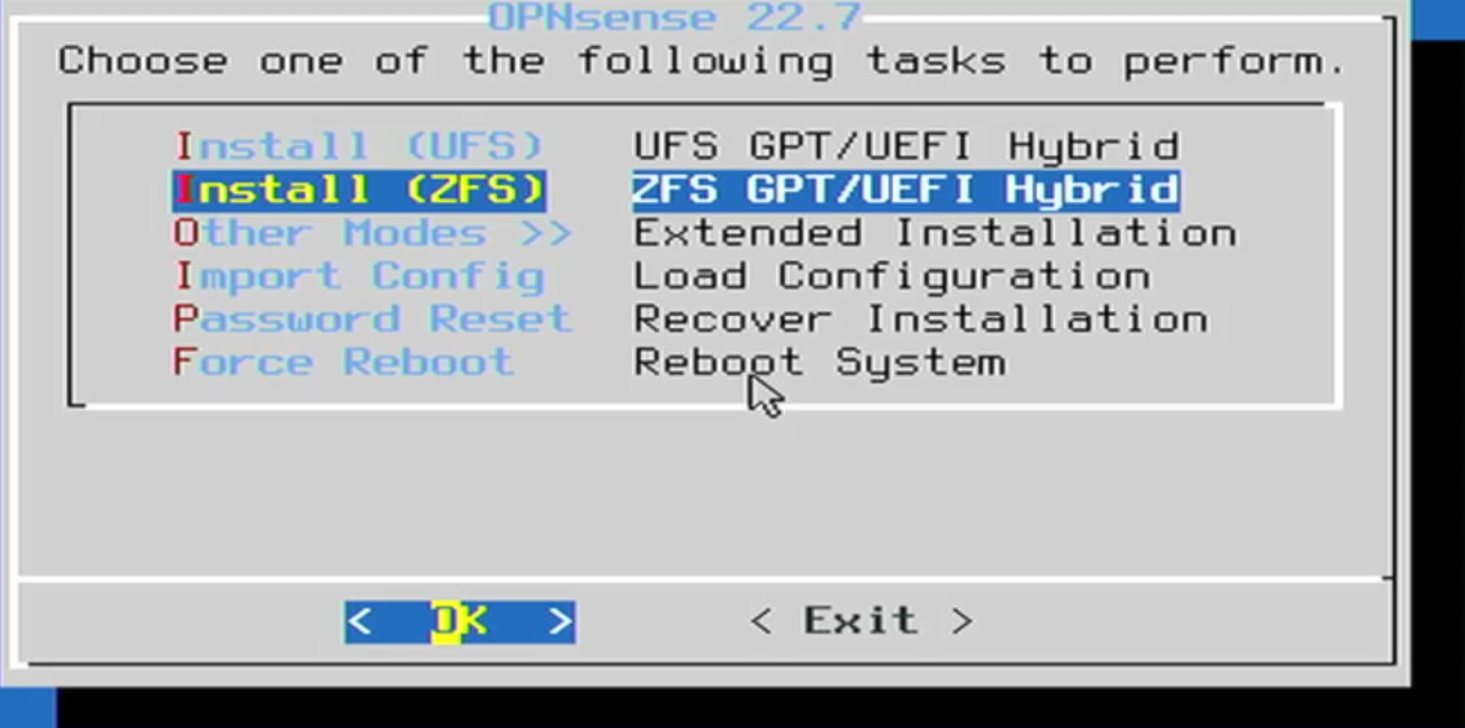
-
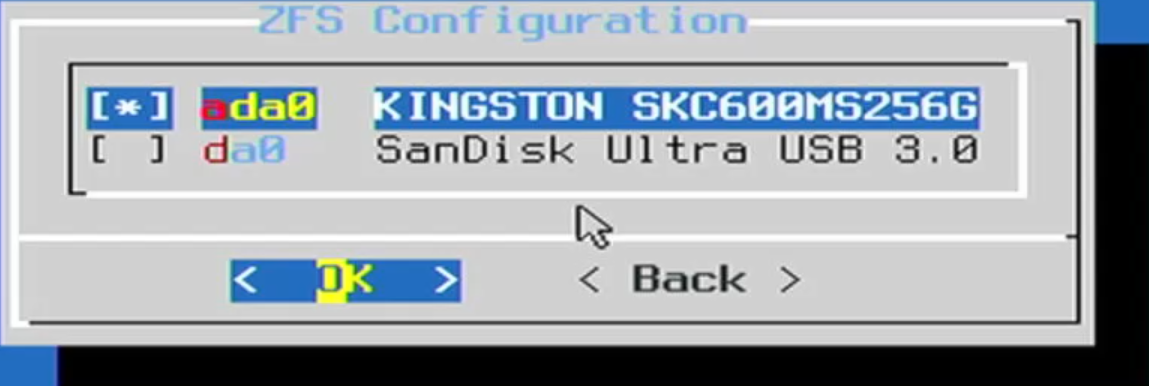
Select the disk you want to install it into. (Press Space).
dangerThis process will DELETE any data in your disk.
-
Select
OK -
Read the
Warningand SelectYESIf you want to change root password now select
Root PasswordAlternatively change
Complete Installand you can change it later on the Web GUI. -
Remove USB and let machine boot into
OPNSenseDepending on your network, you probably will have to configure your interfaces directly on the
OPNSensemachine.If that's the case, login with
rootandopnsense(or the new root password if you changed it).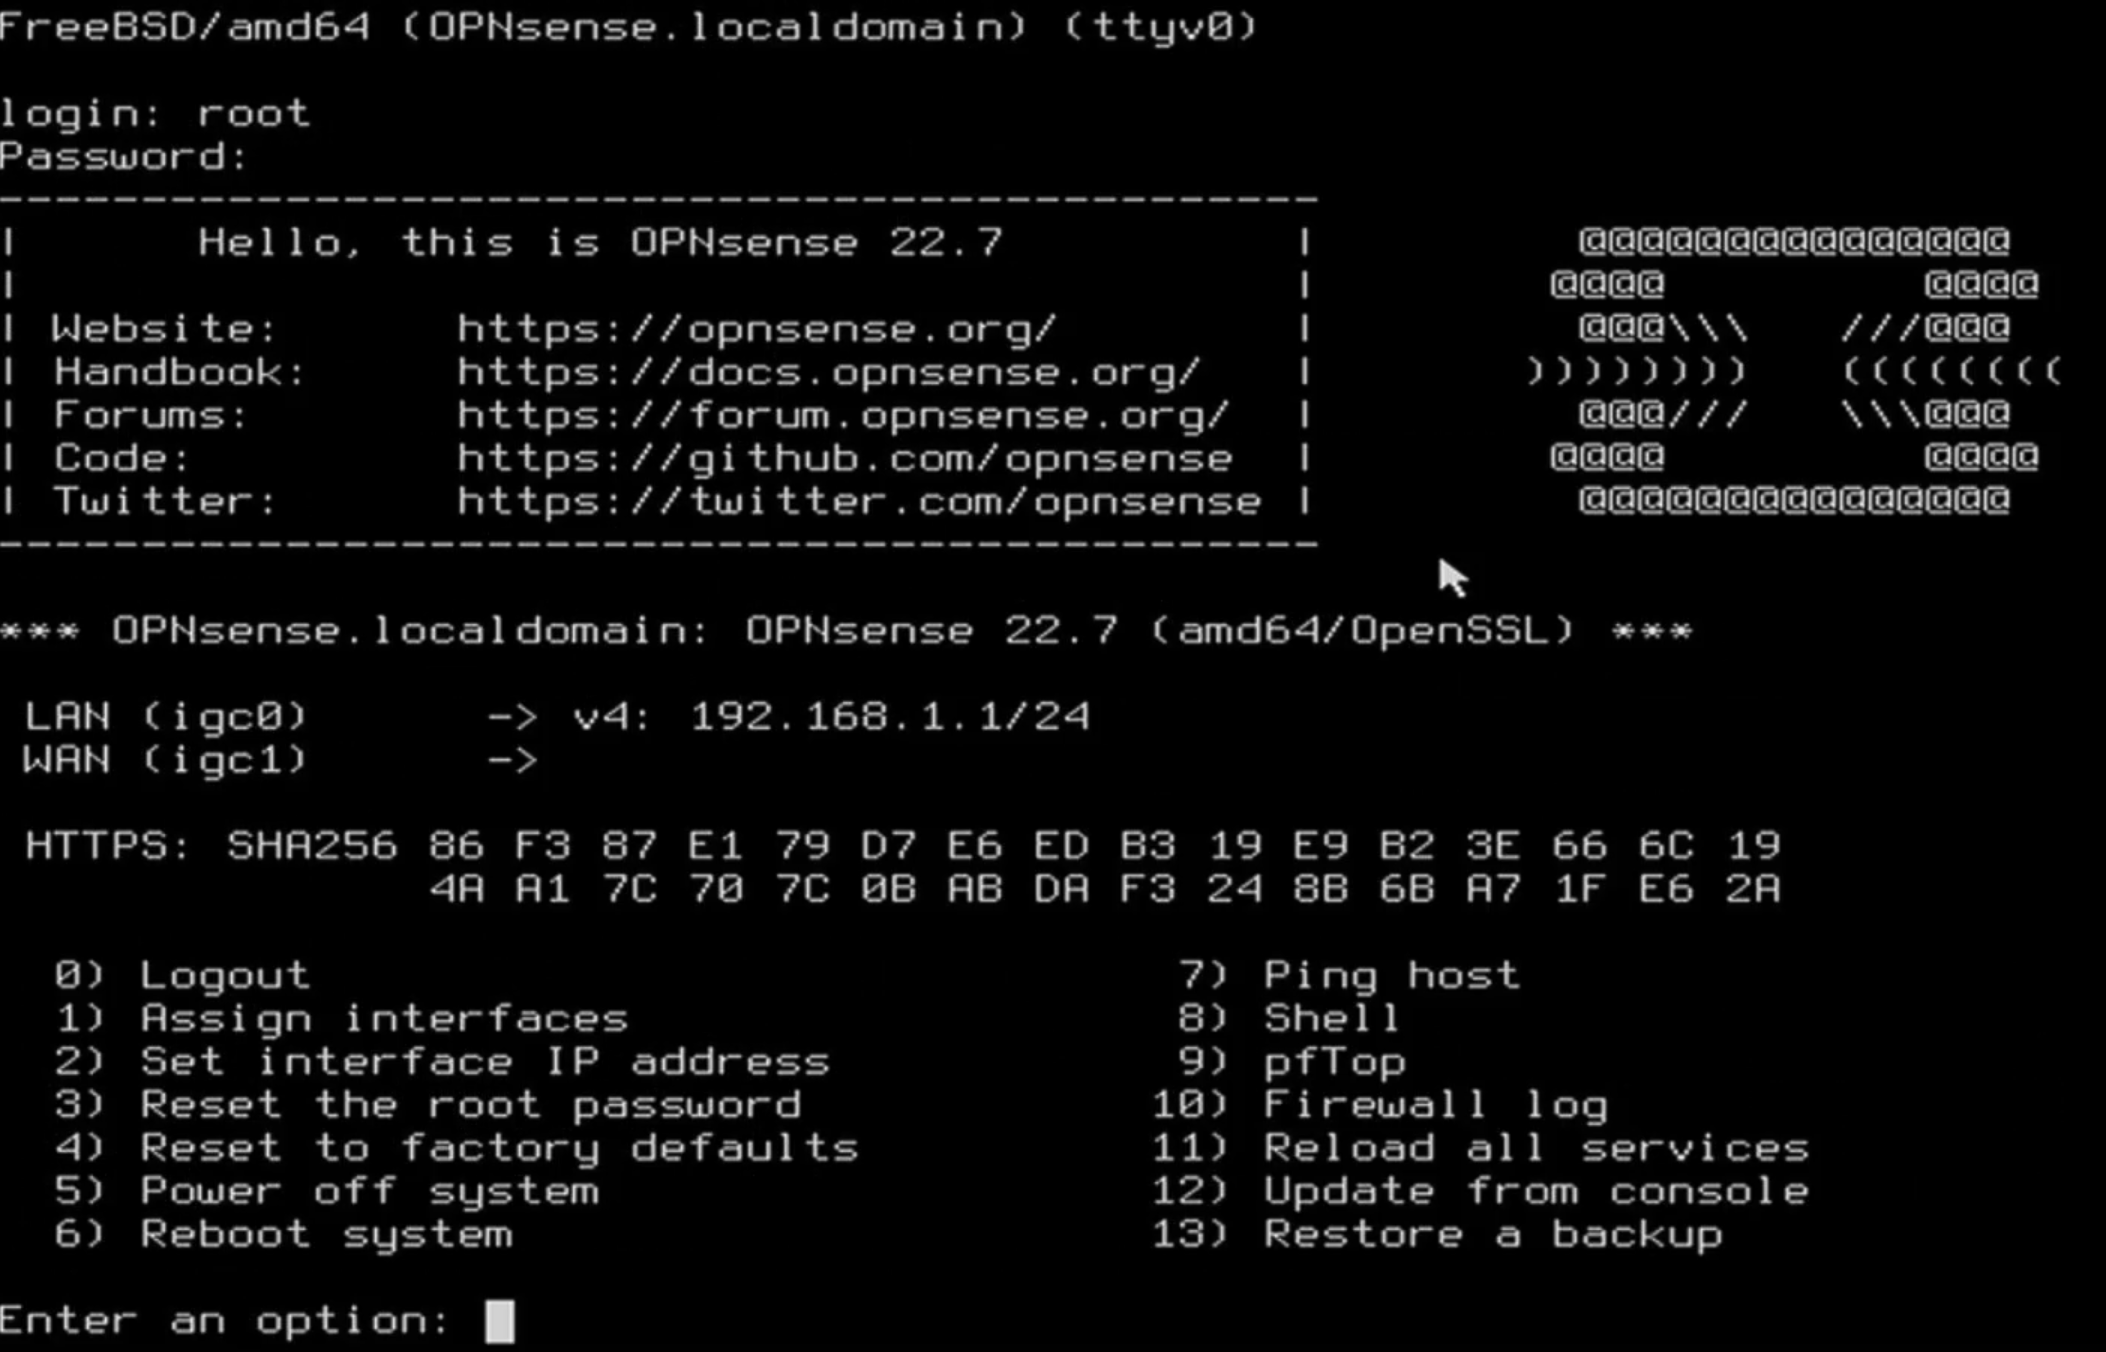
If it didn't auto configured the LAN interface at least select option
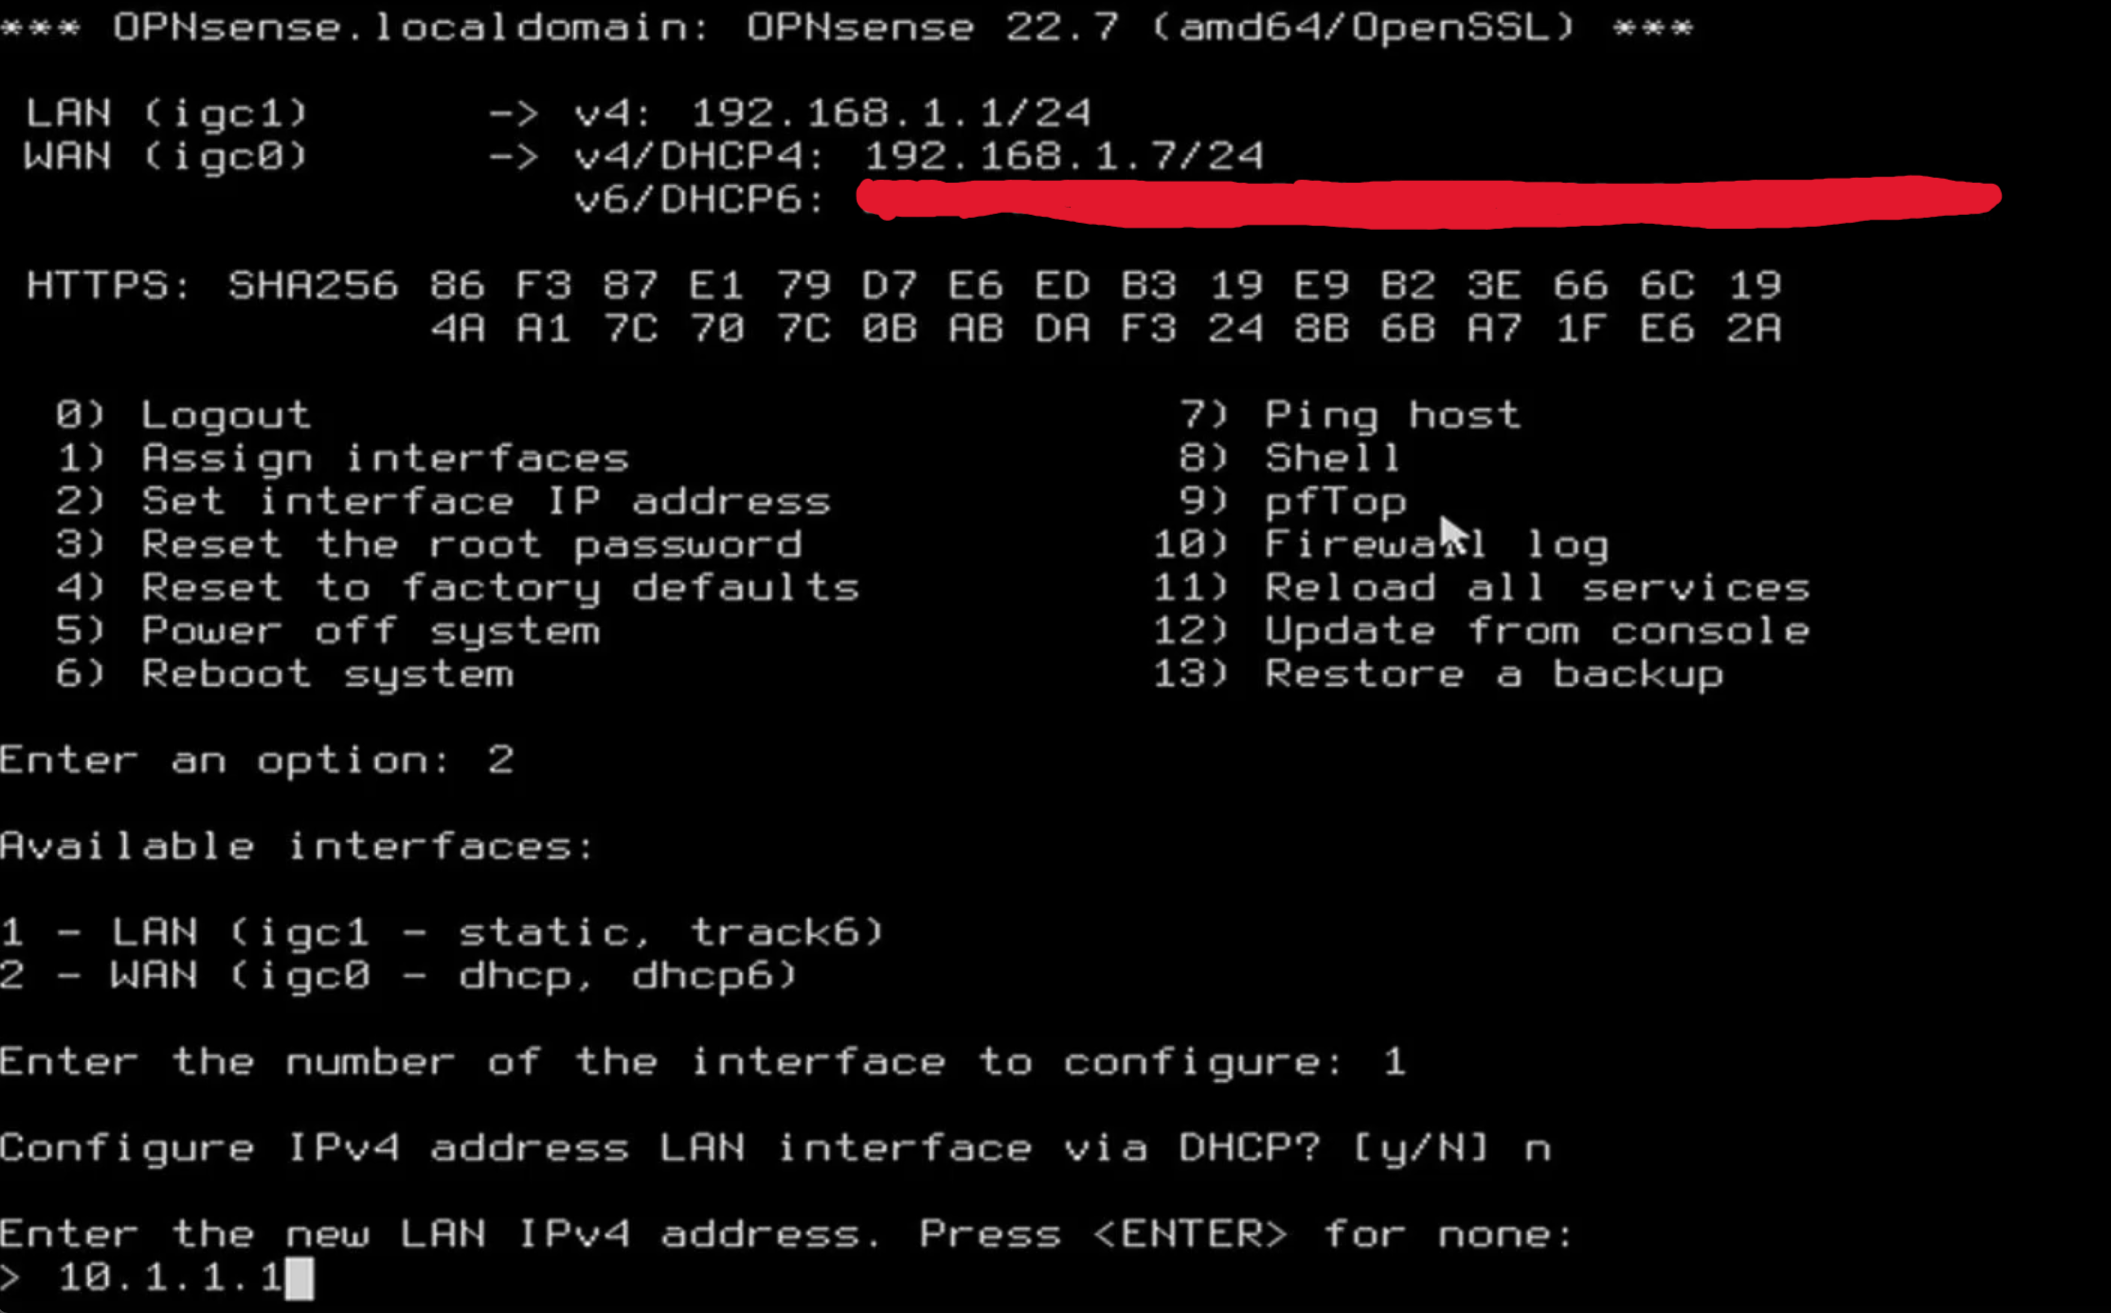
1and follow onscreen instructions Prefer using theaoption. It's easier.Let's configure the
LANinterface address.- Select option
2 - Select the
LANinterface. Usually option1 - Enter your preferred
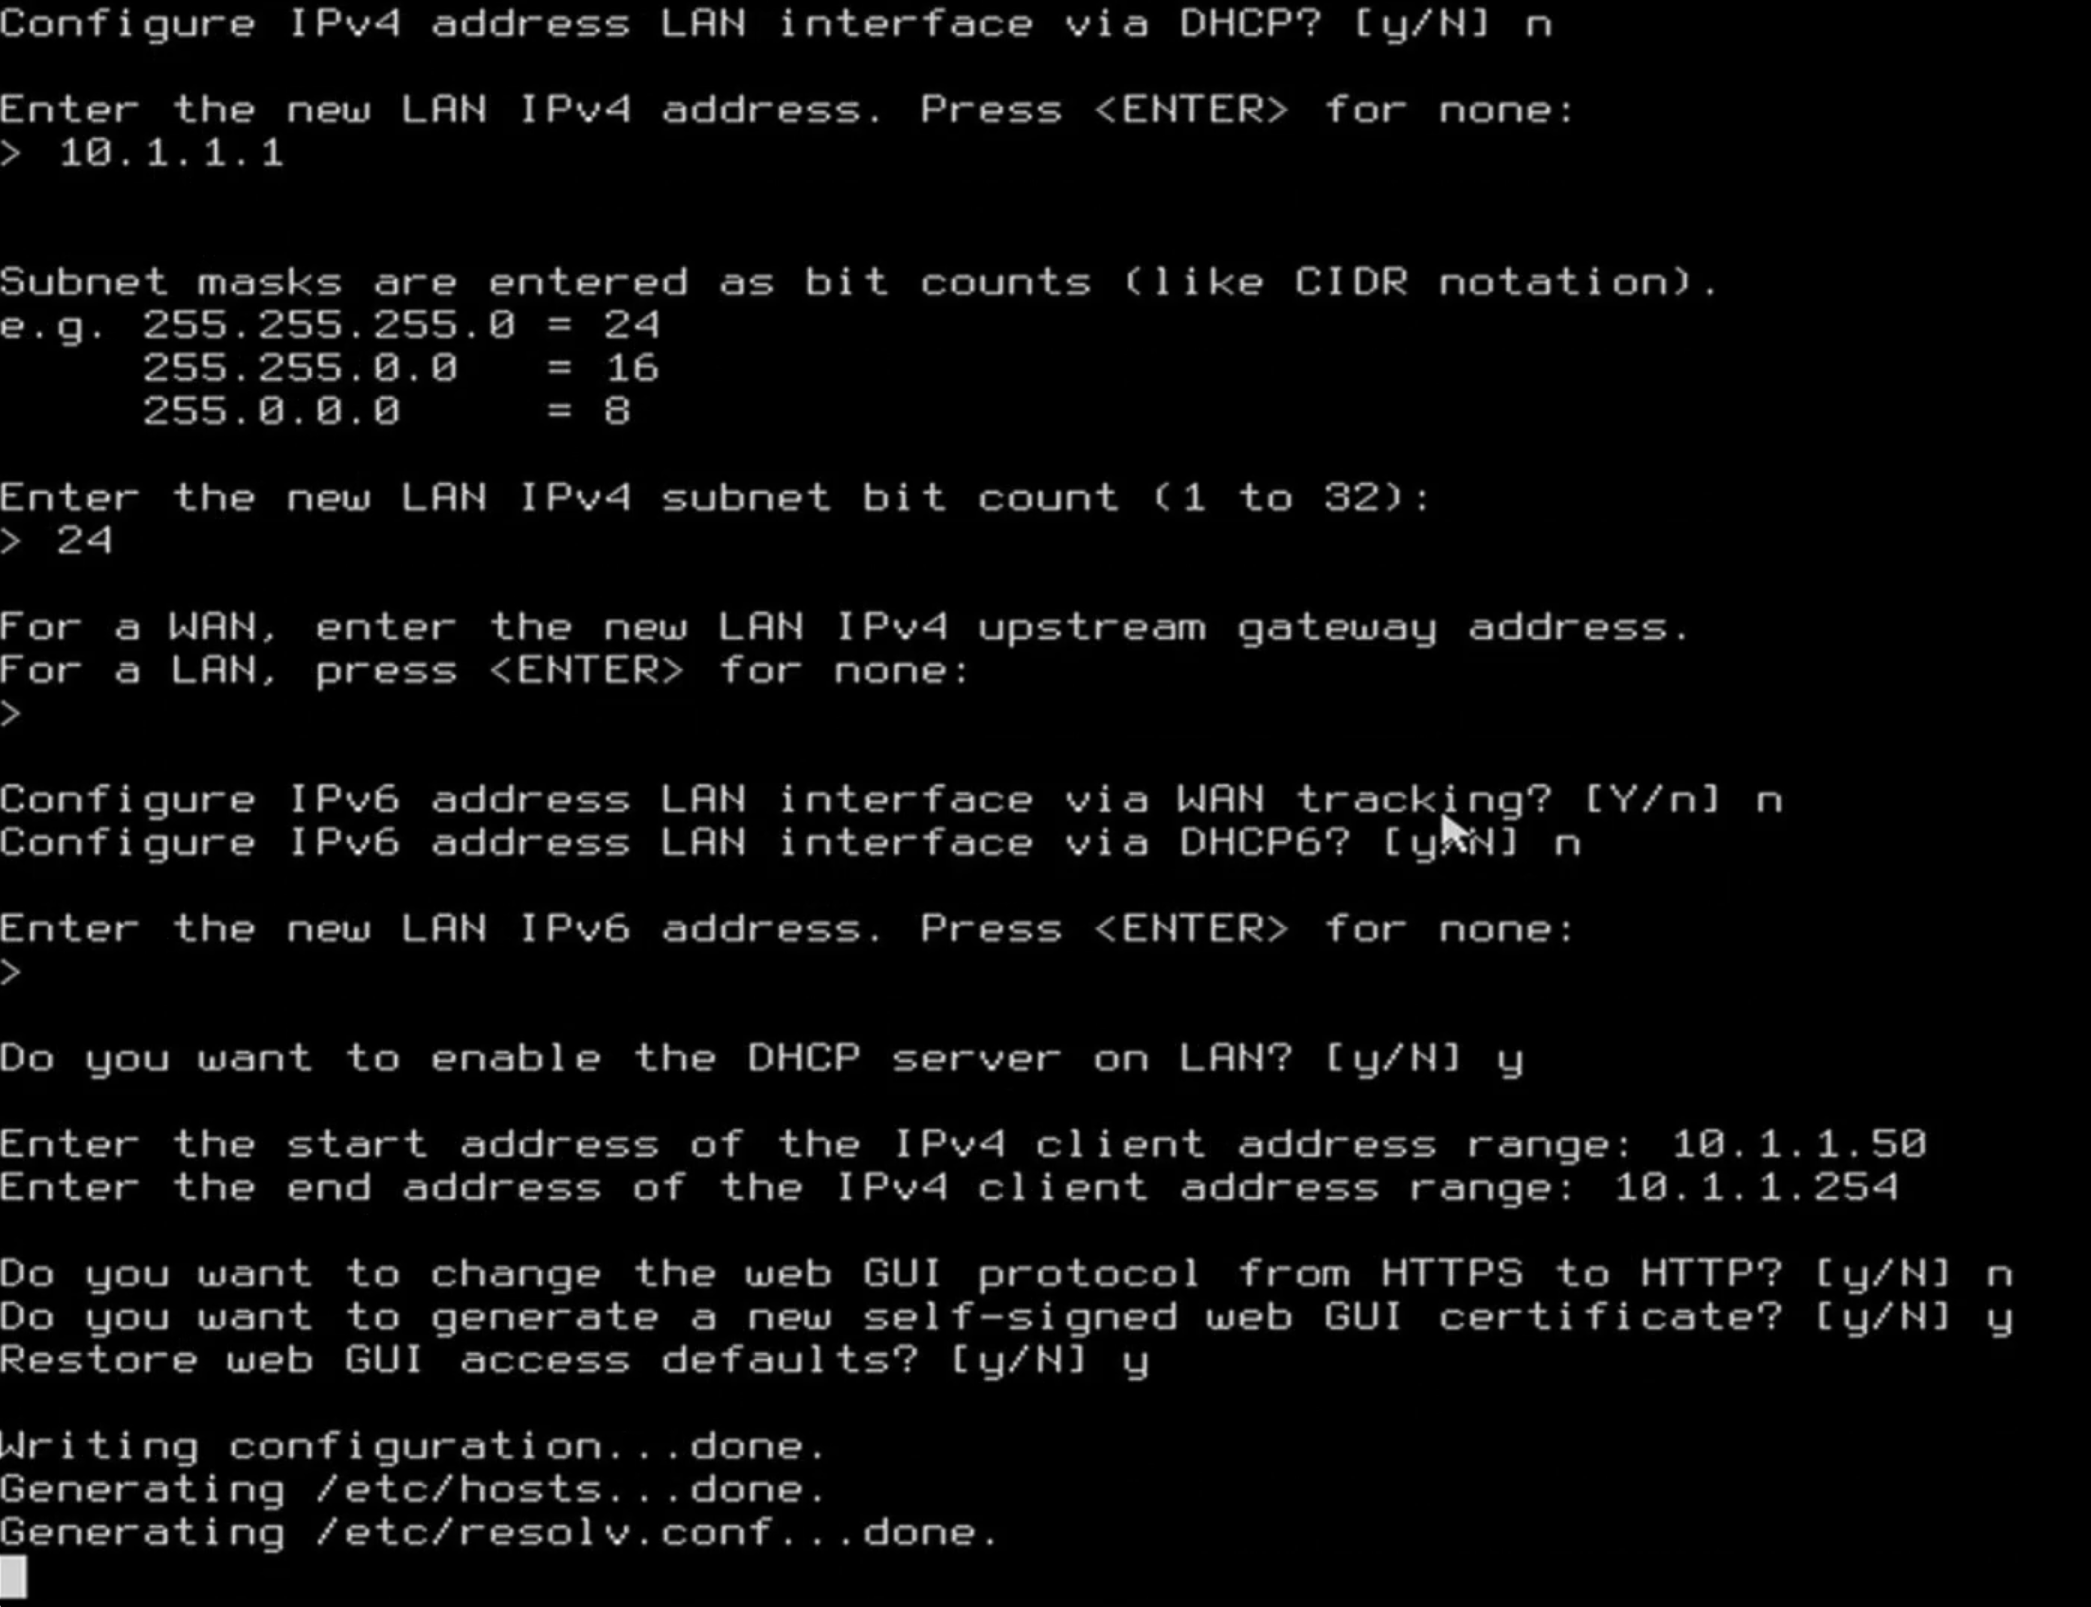
LANIP (eg. 10.1.1.1)
- Enter your preferred subnet mask. (Usually
24) - Configure
IPv6for LAN via WAN tracking:n - Configure
IPv6for LAN via DHCP6:n - Enter new
IPv6address: Leave empty, Press Enter - Do you want to enable
DHCPserver onLAN:y - Enter start
DHCPIPv4 address:10.1.1.50(I keep a range for static mappings) - Enter end
DHCPIPv4 address:10.1.1.254 - Do you want to change Web GUI protocol to
HTTP:n - Do you want to generate new self-singed cert:
y - Restore Web GUI access to defaults:
y
- Select option
-
Now you are ready to access Web GUI on
https://10.1.1.1
Installation on Virtual Machine
TODO: Guide